Hi, there. Often, we need to debug an unstable application that can destroy our system and because so we use a virtual machine. For debugging on the VM or other remote pc, Microsoft developed remote debugging tools which supporting since Visual Studio 2012 and later. In this article, we talk about remote debugging with the visual studio. First, we should prepare the virtual machine that we will use to test some apps. Then we are going to the microsoft website, and download the tools for our Visual Studio.
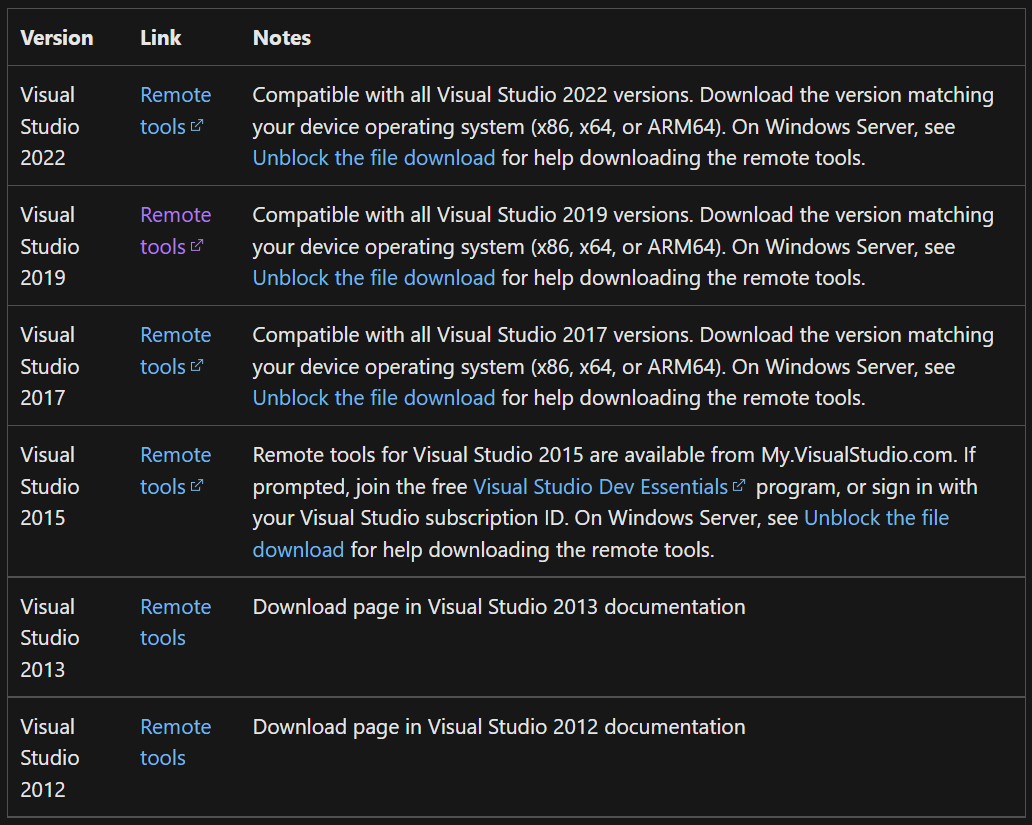
After downloading tools, transfer them to the virtual machine and install. Then we are going to configure the VS tools. First, we should compile an app that we will use for tests, and move this test app in the virtual machine. Next step we should run the tool that we have installed on the virtual machine.
Path to tools:
C:\Program Files\Microsoft Visual Studio 16.0\Common7\IDE\Remote Debugger\x64\msvsmon.exe
After we have got window, and we should accept configure remote debugging.

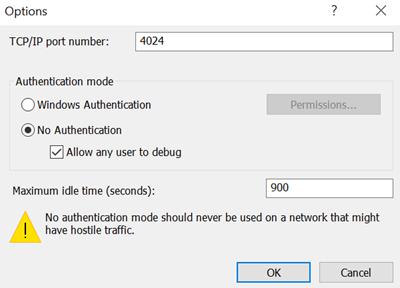
Then we should open Tools->Options (CTRL + O), and set checkboxes as shown in the screenshot.
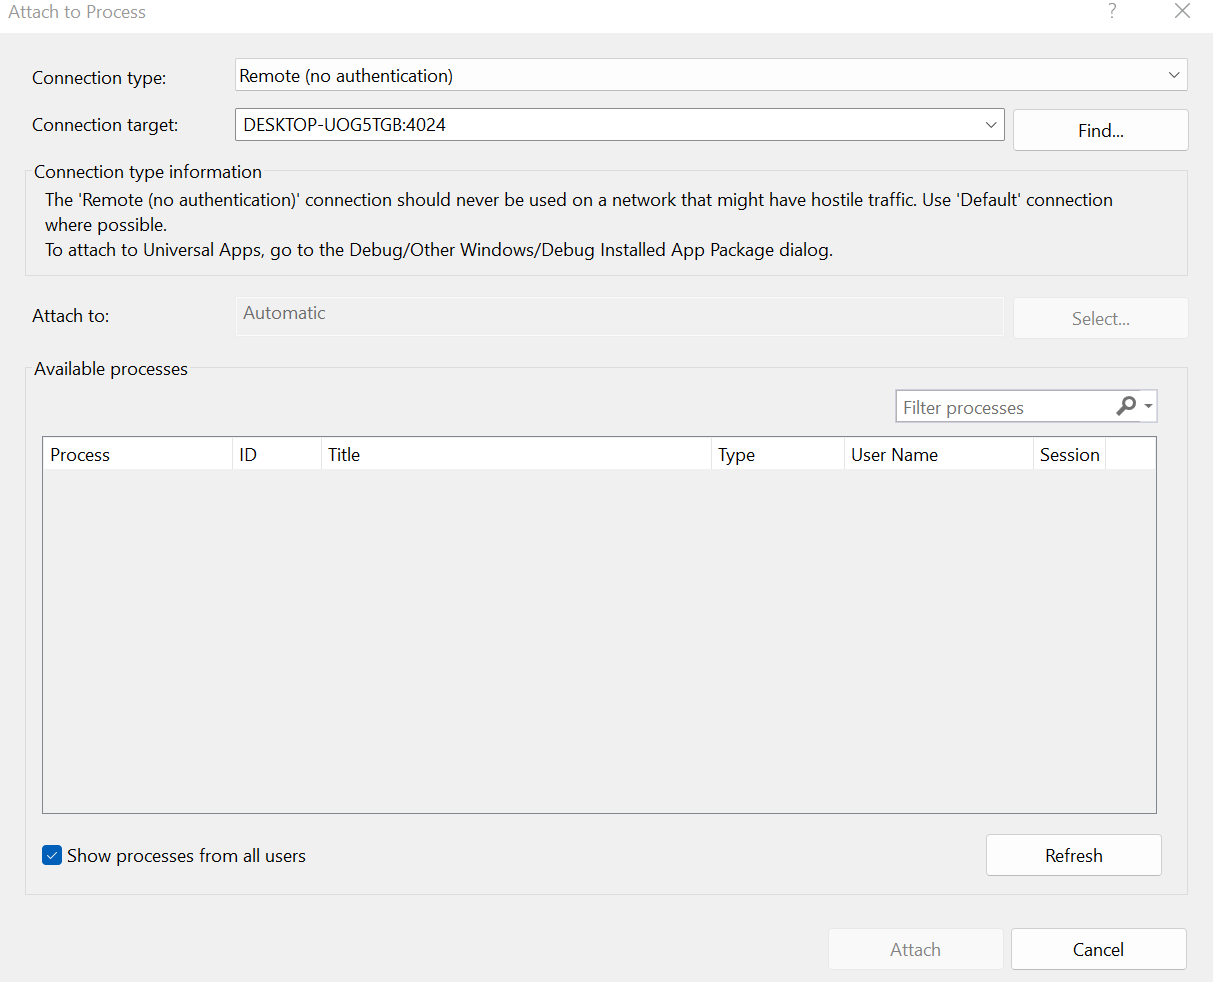
Next step we should switch to the host machine and run the visual studio as administrator. After we opening Debug->Attach to Process. In the “Connection type” field, we are setting “Remote (no authentication)”, and the “Connection target:” field, we are setting name and port, which we are looking for in the visual studio remote debug tools window on the VM. Then we should press the find button, select the PC and connect.
After we are going to run the test application on the virtual machine, and attach to the process from the visual studio, and begin debugging the test app.